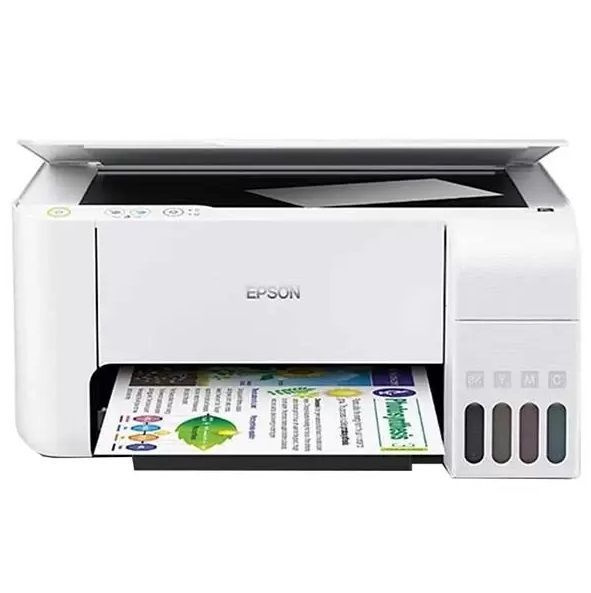
The Epson EcoTank L3216 is a highly popular inkjet printer known for its cost-effective, refillable ink system, making it a favorite for home users and small offices. Unlike traditional cartridge-based printers, the EcoTank series uses large ink tanks that significantly reduce printing costs while delivering high-quality prints. Its compact design, wireless printing capabilities, and energy efficiency add to its appeal.
However, like any electronic device, the Epson EcoTank L3216 can encounter occasional issues—whether due to improper maintenance, software glitches, or hardware malfunctions. Some users report problems like printing errors, connectivity issues, or ink-related troubles, which can disrupt productivity if not resolved quickly.
The purpose of this guide is to help you identify and troubleshoot the most common Epson EcoTank L3216 problems efficiently. By following these solutions, you can minimize downtime, extend your printer’s lifespan, and ensure smooth printing operations. Let’s dive into the top issues and their fixes!
1. Printer Not Powering On – Detailed Troubleshooting Guide
Possible Causes and In-Depth Analysis
-
Power Supply Issues
-
Loose Connections: Over time, power cables can become loose due to movement or accidental tugs.
-
Damaged Power Adapter: Frayed wires or a faulty AC adapter can prevent proper power delivery.
-
Unstable Power Outlet: The wall socket may be defective or not providing consistent voltage.
-
-
Printer Power Button Malfunction
-
Stuck Button: Dust accumulation or physical damage may prevent the button from functioning.
-
Internal Wiring Fault: The power button’s connection to the mainboard could be compromised.
-
-
Electrical Damage
-
Power Surges: Lightning strikes or voltage spikes can fry internal components.
-
Fuse Blowout: Some printers have internal fuses that may blow during electrical faults.
-
-
Firmware or System Crash
-
A corrupted firmware update or system error may cause the printer to become unresponsive.
-
Step-by-Step Troubleshooting Solutions
Step 1: Basic Power Checks
-
✔ Inspect the power cable – Look for visible damage, bent pins, or loose connections.
-
✔ Test the outlet – Plug in another device (like a lamp) to confirm it’s working.
-
✔ Try a different power cable – If available, swap with a compatible cable to rule out adapter failure.
Step 2: Printer Hard Reset
-
🔄 Hold the power button for 30 seconds – This discharges residual power and resets the printer’s internal circuitry.
-
🔌 Unplug for 5 minutes – Allows capacitors to fully drain before restarting.
Step 3: Check for Physical Damage
-
🔍 Examine the power port – Bent or corroded pins inside the printer’s DC jack can interrupt power.
-
👃 Sniff test – A burnt smell near the power supply indicates serious electrical damage.
Step 4: Test with Alternative Power
-
⚡ Use a UPS or surge protector – Helps identify if voltage fluctuations are the culprit.
-
🔋 Battery-powered test (if applicable) – Some models support mobile power banks via USB.
Step 5: Firmware Recovery
-
💻 Connect to Epson Software – Use Epson’s firmware recovery tool if the printer freezes during startup.
When to Seek Professional Help
-
If the printer shows no signs of life after all steps.
-
If you detect burn marks, melted plastic, or sparks.
-
When the printer powers on, but immediately shuts off (indicating a short circuit).
Prevention Tips
-
🛡 Always use a surge protector – Especially in areas with unstable power grids.
-
🧹 Keep vents clean – Overheating can damage power components.
-
🔌 Unplug during storms – Prevents surge damage from lightning strikes.
2. Poor Print Quality or Faded Prints – Comprehensive Troubleshooting Guide
Possible Causes and Technical Explanations
-
Clogged Printhead Nozzles
-
Ink Drying: Nozzles clog when printers sit unused for extended periods.
-
Ink Contamination: Mixing different ink types or using non-genuine inks causes buildup.
-
-
Ink Supply Issues
-
Low Ink Levels: Tanks may appear full but have air pockets blocking flow.
-
Air Bubbles: Trapped air in ink tubes disrupts consistent ink delivery.
-
-
Incorrect Printer Settings
-
Paper Type Mismatch: Glossy paper settings used for plain paper (or vice versa).
-
Draft Mode Enabled: Accidentally set to low-quality printing.
-
-
Hardware Problems
-
Worn Printhead: Age reduces nozzle precision (common after 10,000+ pages).
-
Misaligned Cartridges: Improper installation affects ink distribution.
-
Step-by-Step Troubleshooting Solutions
Step 1: Basic Maintenance
🛠 Run Nozzle Cleaning (2–3 times max per session):
-
Windows: Epson Printer Utility > Maintenance > Head Cleaning.
-
Mac: System Preferences > Printers & Scanners > Utility > Clean Print Head.
⚠️ Warning: Over-cleaning wastes ink. Wait 10 minutes between cycles.
Step 2: Ink System Checks
💧 Verify Ink Levels:
-
Check via printer panel or Epson Smart Panel app.
-
Refill if below 20%, even if not empty (prevents air intake).
🌀 Remove Air Bubbles: -
Open ink tank caps for 1 hour to equalize pressure.
-
Gently tap ink tanks to dislodge bubbles.
Step 3: Printhead Alignment & Calibration
📐 Auto-Align Heads:
-
Printer menu > Settings > Maintenance > Print Head Alignment.
🎨 Color Calibration: -
Use the built-in “Print Quality Diagnostics” sheet (prints test patterns).
Step 4: Advanced Solutions
🧴 Manual Nozzle Cleaning (Severe Clogs):
-
Dampen a lint-free cloth with distilled water, gently wipe the printhead.
-
For stubborn clogs: Use Epson-approved cleaning solution.
🔄 Deep Cleaning Mode: -
Access via Epson Service Utility (requires technical confidence).
Step 5: Settings Optimization
🖨 Adjust Print Quality:
-
Always select “High Quality” or “Best Photo” for critical prints.
📄 Match Paper Settings: -
Ensure driver settings match the exact paper type (e.g., “Epson Premium Glossy”).
Preventive Measures
✅ Monthly Maintenance Prints: Prevent clogs by printing a color page weekly.
🚫 Avoid 3rd-Party Inks: Generic inks often cause clogs and color shifts.
🌡 Control Environment: Keep printer in 15–30°C range (extreme temps thicken ink).
When to Replace Parts
-
Printhead Failure: If streaks persist after 5+ cleanings, replacement (~$50–$100) may be needed.
-
Ink Tank Leaks: Cracked tanks require immediate replacement to prevent damage.
Pro Tip: For photo printing, always use Epson’s photo paper—their coatings optimize ink absorption.
Final Recommendation:
90% of print quality issues resolve with proper cleaning and settings. If problems continue after 48 hours of troubleshooting, contact Epson Support for firmware/diagnostic tools.
3. Paper Jams or Feeding Issues – Complete Troubleshooting Manual
Root Causes & Technical Analysis
-
Paper Handling Problems
-
Incorrect Loading: Overfilled tray or uneven stack causes misfeeds.
-
Poor Paper Quality: Recycled or damp paper curls easily.
-
Wrong Paper Size Setting: Printer expects a different size than loaded.
-
-
Mechanical Obstructions
-
Foreign Objects: Staples, torn pieces, or dust block the path.
-
Sticky Residue: Adhesive from labels contaminates rollers.
-
-
Wear & Tear
-
Degraded Rollers: Rubber loses grip after ~20,000 pages.
-
Bent Feed Tray: Improper handling warps plastic components.
-
Step-by-Step Resolution Guide
🛑 Immediate Action When Jam Occurs
-
Power Off – Prevent further damage.
-
Access Jam – Open rear tray + duplex unit (if equipped).
-
Slow Extraction – Pull paper in the direction of the paper path; never yank sideways.
🔧 Advanced Troubleshooting
For Persistent Jams:
-
Inspect Paper Path with flashlight for:
-
✖ Tiny paper fragments
-
✖ Label remnants
-
✖ Roller debris
-
-
Manual Roller Cleaning:
-
Dampen cloth with *distilled water + isopropyl alcohol (50/50 mix)*
-
Rotate rollers while wiping (access via maintenance menu)
-
Roller Rehabilitation
-
Temporary Grip Boost: Rub rollers with rubber rejuvenator (or mild soap water)
-
DIY Test: If paper slips >3 times when inserted manually, replace rollers (~$15–$30)
⚙️ Calibration & Settings
-
Adjust Guide Tightness – Should hold paper snugly without bending edges
-
Tray Capacity – Never exceed 150 sheets for 80gsm paper
-
Special Media Mode – Enable “Thick Paper” setting for cardstock
Prevention Protocol
✅ Paper Storage – Keep sealed in original package with desiccant
✅ Pre-Feed Inspection – Fan stacks to separate sheets + check for wrinkles
✅ Maintenance Schedule – Clean rollers monthly with Epson Roller Cleanser
⚠️ Critical Don’ts
-
Never use lubricants on rollers
-
Avoid pulling jammed paper backward
-
Don’t mix paper types in the tray
When Parts Need Replacement
-
Feed Rollers – Replace if shiny/smooth (loss of tread pattern)
-
Separation Pads – Worn pads cause multi-sheet feeds
-
Entire Paper Assembly – Consider if jams recur in the same spot
Pro Tip: For thermal paper jams (receipt printers), use cooling gel to harden wax coating before removal.
Escalation Path
If jams persist after 3+ attempts:
-
Run Epson’s Paper Feed Test (hidden service menu)
-
Check for warped internal guides (requires disassembly)
-
Submit diagnostic log via Epson Smart Panel
4. Printer Not Recognized by Computer – Complete Troubleshooting Guide
In-Depth Problem Analysis
-
Connection Issues
-
Physical Connection Problems: Loose USB ports or damaged cables
-
Port Conflicts: Other devices using the same USB hub resources
-
Wireless Interference (for wireless models): Router signal conflicts
-
-
Software & Driver Problems
-
Outdated Drivers: Incompatible with the current OS version
-
Corrupted Installation: Failed updates or improper uninstalls
-
Firewall/Antivirus Blocking: Security software prevents communication
-
-
System Configuration Errors
-
Default Printer Conflicts: Multiple printers confuse the system
-
Spooler Service Crashes: Print queue management failures
-
Power Management Settings: USB selective suspend interfering
-
Step-by-Step Solutions
🔌 Physical Connection Checks
-
Test Different USB Ports
-
Try all USB 2.0/3.0 ports directly on the computer (avoid hubs)
-
-
Cable Inspection
-
Look for bent pins, fraying, or loose connectors
-
Test with another certified USB 2.0 cable (max 3m length)
-
-
Wireless Troubleshooting
-
Reboot the router and printer
-
Verify 2.4GHz/5GHz network compatibility
-
💻 Driver Solutions
-
Clean Reinstallation
-
Uninstall via Control Panel > Restart > Download fresh from Epson
-
Use Epson’s “Clean Install” option during setup
-
-
Driver Rollback
-
Device Manager > Printer > Driver > Roll Back (if available)
-
-
Manual Driver Selection
-
Point Windows Update to Epson’s INF files
-
⚙️ System Configuration
-
Print Spooler Reset
net stop spooler
del %systemroot%\System32\spool\printers\* /Q
net start spooler
-
USB Power Management
-
Disable “USB selective suspend” in Power Options
-
-
Default Printer Setting
-
Set as default + check “Use printer offline” is disabled
-
Advanced Diagnostics
🔍 Windows Event Viewer
-
Check “PrintService” errors for specific failure codes
🛠️ Epson Service Tools
-
Run “EPSON Status Monitor 3” for connection diagnostics
-
Use “EPSON Net Config” for network models
🌐 Network-Specific Checks
-
Verify the printer IP matches the driver configuration
-
Check for IP conflicts in the router admin panel
Prevention & Maintenance
✅ Monthly Maintenance
-
Update drivers quarterly
-
Clean USB contacts with isopropyl alcohol
✅ Connection Best Practices
-
Use USB 2.0 for the most reliable connection
-
Assign a static IP to network printers
⚠️ Critical Notes
-
Never connect via USB and wireless simultaneously
-
Disable “fast startup” in Windows power settings
When to Seek Professional Help
-
If the printer appears in “Unknown Devices” with a yellow bang
-
When all USB ports fail to recognize (possible motherboard issue)
-
If error codes persist after a complete driver wipe
Pro Tip: For Windows 10/11, enable “Printer Extension” in optional features for full functionality.
5. Ink Not Filling or Leaking – Expert Troubleshooting Guide
Root Causes & Technical Breakdown
-
Refilling Errors
-
Overfilling: Exceeding the max fill line causes backflow.
-
Wrong Ink Type: Using non-Epson inks changes viscosity.
-
Contaminated Nozzles: Dried ink chunks block proper flow.
-
-
Hardware Failures
-
Cracked Tanks: Stress fractures from drops or overtightening.
-
Worn Seals: Degraded O-rings (common after 50+ refills).
-
Faulty Ventilation: Clogged air vents create pressure imbalances.
-
-
Ink System Issues
-
Air Lock: Large bubbles trap ink in tubes.
-
Clogged Dampers: Filters get blocked by pigment particles.
-
Step-by-Step Solutions
🖨️ Immediate Leak Containment
-
Power Off Immediately – Prevent electrical damage.
-
Absorb Spills – Use lint-free cloths (never paper towels).
-
Invert Printer – Place on towels with ink tanks up for 2 hours.
🔧 Refill Procedure Correction
-
Precision Filling:
-
Use a syringe with a blunt needle for control.
-
Stop at 1cm below the max line (ink expands when priming).
-
-
Vent Management:
-
Keep tank vents open during refilling.
-
Wait 5 minutes before resealing caps.
-
🧰 Hardware Inspection
-
Tank Integrity Test:
-
Remove tanks and submerge in water.
-
Look for air bubbles indicating cracks.
-
-
Seal Replacement:
-
Order OEM Epson seal kit (EP-CTA-CL).
-
🌀 Air Bubble Removal
-
Manual Priming:
-
Gently tap ink lines to dislodge bubbles.
-
Use Epson’s “Ink Charge” utility (service menu).
-
-
Advanced Flushing:
-
For stubborn airlocks, use the syringe method on the waste ink pad.
-
Prevention Protocol
✅ Refill Best Practices
-
Always wear nitrile gloves to prevent skin oils from contaminating ink.
-
Store ink bottles upright at 15-25°C.
✅ Maintenance Schedule
-
Replace all seals annually.
-
Run nozzle checks weekly if unused.
⚠️ Critical Warnings
-
Never shake ink bottles before filling (creates microbubbles).
-
Avoid aftermarket “high capacity” tanks (cause pressure issues).
When Professional Repair is Needed
-
If ink reaches the mainboard (requires full disassembly).
-
When leaks persist after 3 seal replacements.
-
If the printer displays the “Ink System Failure” error.
Pro Tip: Keep Epson’s emergency ink absorbent pads (part #SGD-041) for major spills.
Final Checklist
✔ Verify tank vents are clear
✔ Confirm ink viscosity matches specs (check batch code)
✔ Test print after 24hrs of rest
Keeping Your Epson EcoTank L3216 Running Smoothly
The Epson EcoTank L3216 is a reliable and cost-effective printer, but like any device, it can encounter occasional issues. By understanding the five most common problems—power failures, print quality issues, paper jams, connectivity errors, and ink system malfunctions—you can quickly diagnose and resolve most issues on your own.
Key Takeaways
✔ Power Problems? Check cables, reset the printer, and use a surge protector.
✔ Faded Prints? Clean nozzles, check ink levels, and use genuine Epson supplies.
✔ Paper Jams? Clear obstructions carefully and maintain rollers.
✔ Connection Errors? Reinstall drivers and verify USB/wireless settings.
✔ Ink Issues? Refill properly, inspect tanks, and remove air bubbles.
Prevention is Key
-
Perform regular maintenance (nozzle checks, roller cleaning).
-
Always use Epson-approved inks and paper.
-
Keep firmware and drivers updated for optimal performance.
If problems persist after troubleshooting, don’t hesitate to contact Epson Support or visit an authorized service center. A little care goes a long way in extending your printer’s lifespan!
Need More Help?
➔ Comment below with your specific issue for personalized advice!
➔ Bookmark this guide for future reference.
Happy printing! 🖨️✨
Read More: How do I change the print size on an Epson printer?