Is your Epson Ecotank printer giving you faded or streaky prints? Don’t worry — this is a common issue. Most of the time, it happens because the print head is clogged. Ink can dry up inside the nozzles if the printer isn’t used often. Cleaning the print head can help fix this problem. You can use built-in tools or do it by hand. In this guide, you’ll learn both automatic and manual ways to clean your Epson Ecotank print head. Follow these easy steps to make your printer work like new again.
2 Types Of Cleaning for Epson Ecotank Print Head
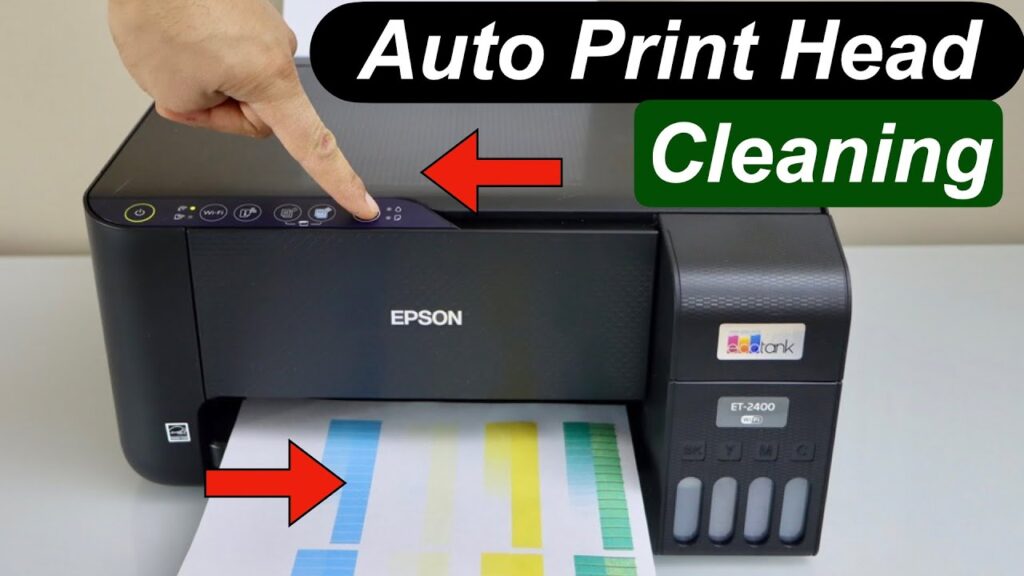
1. Automatic Cleaning
Check for Errors
Before you begin, check the printer’s display screen for any warning or error messages. If the printer shows “Ink Low,” “No Ink Cartridge,” or “Paper Jam,” fix these problems first. Cleaning will not start if the printer has an issue. Make sure all ink tanks have enough ink and that no parts are loose or missing.
Load Paper
Insert a few sheets of plain A4 or Letter-size paper into the paper tray. This is important because the printer might run a nozzle check or print a test page after the cleaning process. Make sure the paper is placed correctly and that the edge guide is snug.
Access Cleaning Utility
You can start the cleaning process in two ways: using the printer’s control panel or your computer software.
Using the Control Panel:
-
Turn on your printer.
-
On the home screen, select the Settings or Setup menu.
-
Navigate to Maintenance.
-
Select Print Head Cleaning.
-
Choose the color or all colors, then press Start.
Using Epson Software on Your Computer:
-
Make sure your printer is connected to your computer.
-
Open the Epson Printer Utility. On Windows, go to Control Panel > Devices and Printers, right-click your Epson printer, and click Printing Preferences.
-
In the Maintenance tab, click on Head Cleaning.
-
Follow the prompts to begin the cleaning process.
Start Cleaning
Once you select the cleaning option, your printer will make noise for a few minutes as it pushes ink through the nozzles to clear any blockages. Don’t turn off the printer during this process. Wait until it finishes.
Nozzle Check
After the cleaning cycle, run a nozzle check to see if the print quality has improved:
-
From the same maintenance menu, choose Nozzle Check.
-
The printer will print a small test pattern.
-
Look at the pattern. If there are missing lines or gaps, run the cleaning process again.
-
Repeat the process 2–3 times if needed. If the print quality does not improve, you may need to try manual cleaning.
Automatic cleaning is a safe and easy way to fix light clogs. However, it uses a good amount of ink, so only do it when necessary.
2. Manual Cleaning
If automatic cleaning doesn’t solve the problem, you can try manual cleaning. This method allows you to directly remove dried ink and clogs from the print head. Follow these steps carefully.
Turn off and Unplug
Before doing anything, turn off your Epson Ecotank printer. Unplug the power cord from the outlet to avoid any risk of electric shock. Also, remove any connected cables or USB cords. Let the printer sit for a few minutes to cool down if it was in use.
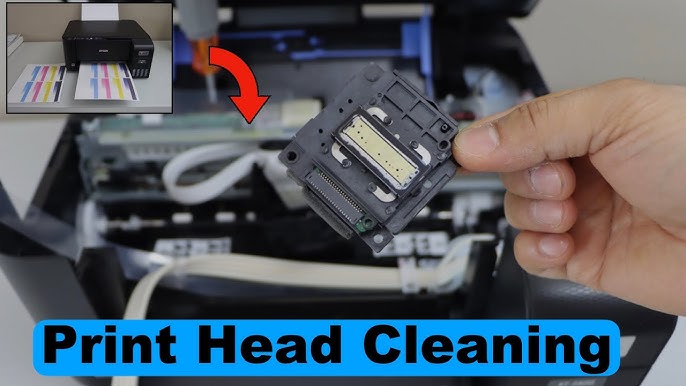
Access Print Head
Open the top cover of your printer to access the ink carriage. The print head is usually located where the ink tanks feed into the carriage.
Carefully move the carriage to the center if it’s not already there. Be gentle — don’t force it if it’s locked in place. Use gloves or paper towels to avoid getting ink on your hands.
Clean Print Head
Here’s how to clean the print head manually:
-
Use a lint-free cloth or paper towel: Lightly dampen it with warm, distilled water. Never use tap water, as it may contain minerals that can damage the printer.
-
Wipe the print head surface: Gently wipe the nozzles and contact points where the ink is released. Avoid using too much pressure.
-
Soak a cloth if needed: If the clog is severe, place a folded damp paper towel under the print head and let it sit for a few hours or overnight. This can help dissolve dried ink.
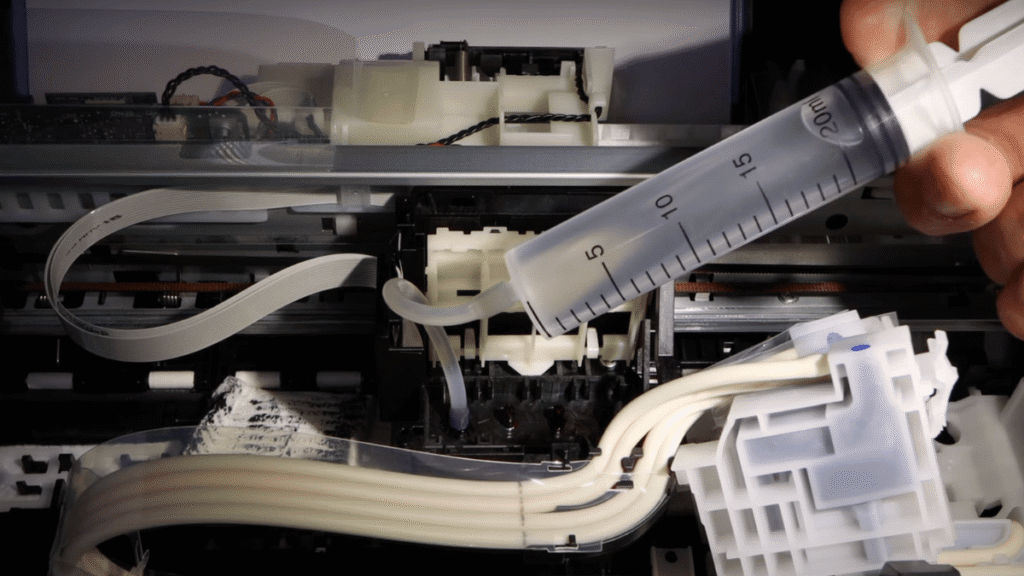
-
Use a syringe or cleaning kit (optional): Some users prefer using a printer cleaning kit, which includes a syringe with tubing and special cleaning fluid. Insert the tube into the ink port and gently push the fluid through to flush out the clog.
Reassemble and Test
Once you’re done, remove the damp towel (if used) and gently move the print head back to its original position. Close the printer cover securely.
Plug the printer back in and turn it on. Now print a test page or run a nozzle check to see if the print quality has improved. If lines or colors are still missing, repeat the manual cleaning one more time.
Important Tip: Manual cleaning should only be done if automatic cleaning fails. It takes more time and care, but it is very effective for severe clogs.
With proper handling, your Epson Ecotank printer will be back to producing clean, sharp prints again.
Video
Final Thoughts
Cleaning the print head of your Epson Ecotank printer is important for keeping your prints sharp and clear. If your prints start to look faded, streaky, or have missing colors, a clogged print head is often the reason. Start with automatic cleaning, as it’s easy and safe for most users. Just follow the steps using your printer’s control panel or software.
If the issue continues, manual cleaning can help. This method takes more time and care, but it reaches deeper clogs that automatic tools might miss. Make sure to turn off and unplug your printer before starting. Use clean materials, and never use force when handling parts inside the machine.
To prevent clogs in the future, print a page or two every few days. This keeps the ink flowing and reduces the chance of buildup. Regular care can help your Epson Ecotank printer last longer and give you better print quality every time.
Read More: How to Load Paper in Epson L810 and L850 Printers – Step-by-Step Guide