If you’ve been thinking about diving into sublimation, you might feel overwhelmed by all the fancy printers on the market. They can be expensive and confusing. But guess what? You might already own a perfect machine to start—an Epson EcoTank printer! It’s cheaper, eco-friendly, and easy to set up. Let’s walk through how to convert yours into a sublimation printer without stress.
What’s Sublimation Anyway?
Sublimation is a special printing method. It uses ink that turns from solid to gas when heated. This magic allows designs to sink right into surfaces—like mugs, t-shirts, pillows—so the colors last forever. The print becomes part of the material, meaning no fading, cracking, or peeling. Clearly, that’s a big win!
Why Choose an EcoTank Printer?
Here’s why EcoTank printers are great for sublimation:
-
Low Ink Cost
They use large refillable tanks, not expensive ink cartridges. That saves you money over time. -
Easy to Refill
Just pop in ink bottles—no fuss with cartridges. -
Reliable Print Head
These printers handle special ink types well, making them ideal for sublimation. -
Simple Conversion
With the right dyes, cleaning, and a few tweaks, you’re set!
What You’ll Need (Tools and Materials)
Before starting, gather everything you’ll need:
-
Epson EcoTank Printer (ET-2800, ET-3750, ET-15000, etc.)
-
Sublimation Ink Kit (four-colors: Cyan, Magenta, Yellow, Black)
-
Cleaning Kit (flush fluid and syringes)
-
Transfer Paper (suitable for sublimation projects)
-
Heat Press or Mug Press (to set the designs)
-
Rubbing Alcohol or dedicated inktank cleaner
-
Protective Gloves and Paper Towels
Step 1: Thoroughly Clean Your Printer
The golden rule is: never mix regular ink and sublimation ink. Mixing them ruins colors and fades prints. Since EcoTanks are refillable, you must clean out all traces of regular ink first. Here’s how:
-
Drain the Tanks: Empty all four ink reservoirs into bottles or containers.
-
Flush Print Head: Use a cleaning kit and syringes to flush with cleaning fluid or alcohol. Do this until the fluid runs clear.
-
Repeat: Run the printer’s cleaning cycle to force out remaining ink.
-
Dry Out: Run a nozzle check to make sure the printer only prints blank. Let everything dry well.
Cleanliness ensures great color results later.
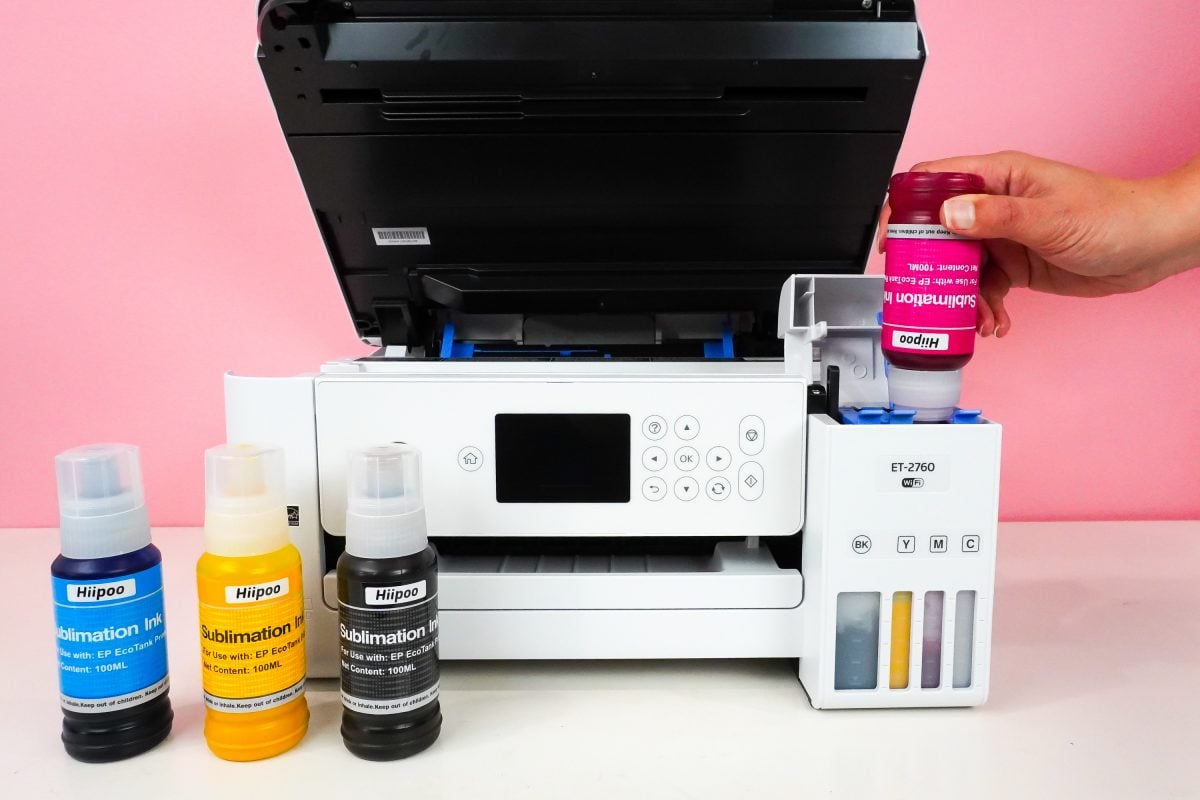
Step 2: Fill With Sublimation Ink
Now your printer is ready for the good stuff! Carefully fill each color tank with sublimation ink:
-
Match the tanks: Cyan to cyan, magenta to magenta, etc.
-
Fill slowly to reduce spills and bubbles.
-
Once filled, run a few print-head cleaning cycles to move ink into the printer lines.
Don’t forget to run a nozzle check again. You might need to repeat cleaning until the print looks smooth and even.
Step 3: Set Up Your Design
Before printing, here’s what to do:
-
Choose Your Design: Use a photo editor or design app.
-
Mirror the Image: Because sublimation prints in mirror—so the final transfer reads correctly.
-
Size It Right: Make sure it fits the item you’ll press (e.g., mug, shirt).
-
Select High Quality: Print settings should be at high resolution and photo quality.
Then load your transfer paper. Print the design onto it, and don’t touch the ink side—it smudges easily!
Step 4: Heat Transfer Time
With the design printed, we move to heat transfer. Here’s how:
For Mugs:
-
Wrap the printed paper around the mug, ink-side down.
-
Use heat tape to keep it in place.
-
Press at about 400 °F (205 °C) for 3–5 minutes, depending on your press.
-
Let it cool before removing the paper.
For T-Shirts:
-
Preheat your heat press at around 385–400 °F (195–205 °C).
-
Pre-press the shirt to remove moisture.
-
Place the transfer paper ink-side down, protect with parchment or butcher paper.
-
Press for about 45–60 seconds under medium pressure.
-
Peel the paper hot or cold—follow paper instructions.
Every material—mug, shirt, bag—may need slightly different settings, so always test once.
Step 5: Ongoing Maintenance
Converted printers need care to stay working well:
-
Run Print-Head Cleanings weekly or if prints start streaking.
-
Use Regularly: Print at least once a week to avoid blockages.
-
Store Properly: If you pause for a long time, remove cartridges and store them upside-down.
-
Refresh Ink: Don’t let sublimation ink sit for months—shake bottles before refill.
A little care goes a long way!
Pros and Cons: Converted Epson
Pros:
-
Sublimation at a fraction of the cost
-
Easy to maintain
-
Excellent print quality for crafts, tees, mugs
Cons:
-
Only works with coated, polyester-based materials
-
Needs cleaning and care
-
Good results need testing attachment, time, and patience
Helpful Tips & Troubleshooting
Faded Colors?
Check ink lines aren’t clogged. Run cleaning cycles and do nozzle checks.
Print Doesn’t Stick to Fabric?
Your t-shirt might need pre-press to remove moisture. Also, check temperature and pressure.
Ink Blotches or Smudges?
Make sure the paper is correctly loaded and not touching anything.
Uneven Mugs?
Rotate your mug in the press halfway through pressing.
Which EcoTank Model Is Best?
Many Epson EcoTank models are suitable, but some are popular for being easier to convert:
-
ET-2800 / ET-2850 – compact and affordable
-
ET-3750 / ET-3850 – include scan/copy and Wi-Fi
-
ET-15000 – great for wide-format prints (11×17″)
Pick based on your project needs: format, features, and budget.
Final Thoughts
Converting an Epson EcoTank printer to a sublimation printer is a smart move. You save cash, avoid wasteful cartridges, and open a world of creative projects. With simple steps—cleaning, filling, printing, and pressing—you can make mugs, shirts, pillows, and more, all with durable, vibrant results.
If you’re thinking of launching a craft business or just want to create gifts at home, this conversion is the perfect start.
Read More: Printer Not Recognising Compatible Cartridges- Some Steps To Take