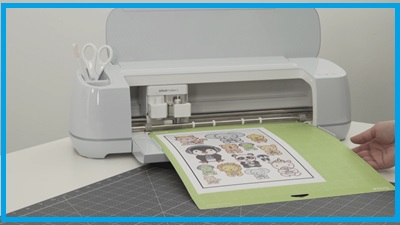
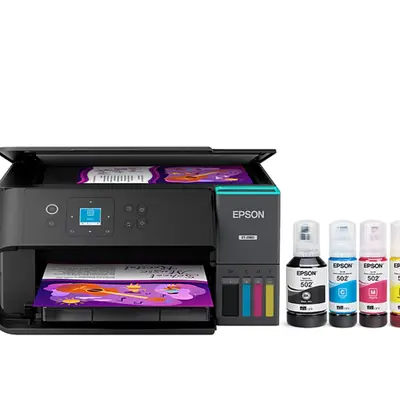
Cricut machines have changed the way people craft. They help users create stunning stickers, labels, cards, and custom designs at home. One powerful feature is the “Print Then Cut” tool in Cricut Design Space. It allows users to first print a design using a home printer, like an Epson, and then cut it out perfectly using their Cricut machine. This process is easy once you understand the steps. However, many users get confused when trying to print directly from Cricut Design Space to an Epson printer.
This guide will walk you through the complete process. You’ll learn how to connect your Epson printer, prepare your design, and send it to print correctly. We will also cover the best settings, types of paper you can use, and common problems you may face. Whether you are printing stickers, iron-on transfers, or party invitations, this guide is for you. Let’s get started and unlock the full potential of your Cricut and Epson printer setup.

What You Need to Get Started
Before you begin printing from Cricut Design Space, make sure you have the following:
-
A Cricut cutting machine (Explore, Maker, or Joy with Print Then Cut support)
-
A computer, tablet, or phone with Cricut Design Space installed
-
An Epson printer (connected via Wi-Fi or USB)
-
Printable materials (paper, sticker sheets, iron-on, etc.)
-
Updated printer drivers have been installed on your computer
-
Cricut-compatible design project ready to go
Now let’s break down each step in detail.
Step 1: Prepare Your Design in Cricut Design Space
When you open Cricut Design Space, start by selecting a project or creating a new one.
-
Use the canvas to add shapes, text, or uploaded images.
-
If you’re using images from the Cricut library or uploading PNG files, make sure they’re set to “Print Then Cut.”
-
You can change the operation type by selecting the layer and setting it to “Print Then Cut” under the Operations menu.
Tips:
-
Use high-resolution images for better print quality.
-
Flatten multiple layers into one printable layer using the “Flatten” tool.
Once your design looks good and is sized correctly, it’s time to move forward.
Step 2: Connect and Prepare Your Epson Printer
Now it’s time to ensure your Epson printer is ready.
-
Turn it on and connect it to the same network as your computer (for Wi-Fi printing) or plug it in using a USB cable.
-
Install or update drivers from the Epson website if needed.
-
Load your printable material (e.g., sticker paper) into the correct tray.
-
Run a test print from another program to confirm your printer is working.
Printer Settings to Check:
-
Set paper size to match what you loaded (usually 8.5″ x 11″)
-
Set print quality to high (for best image output)
-
Use “Best Photo” or “Glossy Paper” settings for shiny sticker paper
Step 3: Click “Make It” in Design Space
Once your design is ready and your printer is connected:
-
Click the green “Make It” button in Cricut Design Space.
-
The preview mat will appear with a black box around your design. This black box is called a registration box.
-
This box helps the Cricut machine scan and cut your design accurately later.
Note:
Don’t remove or resize this black box! It’s essential for proper alignment.
Step 4: Send the Design to Your Epson Printer
-
On the mat preview screen, click “Continue.”
-
Under “Print Then Cut,” choose “Send to Printer.”
-
A pop-up window will appear.
In the pop-up:
-
Select your Epson printer from the list.
-
Toggle “Add Bleed” if you want a slight edge beyond the cut line. This prevents white gaps.
-
Use System Dialog if you want more control (like adjusting color or paper settings).
Click “Print” to send your design.
Step 5: Let Your Epson Print the Design
Once you click “Print,” your Epson printer will begin printing.
-
Let it finish without interruption.
-
Avoid touching the ink if you’re using glossy paper—let it dry fully.
-
Review the print quality. If it looks off, you may need to clean the print head or adjust settings.
Step 6: Cut Your Design Using Cricut
Once printing is complete:
-
Place the printed sheet onto a Cricut cutting mat.
-
Align it just as it appeared in the preview.
-
Load the mat into your Cricut machine.
-
Click “Continue” and let the machine scan the black box.
-
Your Cricut will begin cutting around your printed design.
This process works great for labels, stickers, and even iron-on transfers.
Common Printing Problems and Fixes
1. The printer won’t print
-
Check connections and power.
-
Make sure the right printer is selected in Design Space.
2. Cuts are misaligned
-
Make sure the paper is loaded straight.
-
Keep the black registration box intact.
-
Calibrate your Cricut machine using the built-in tool.
3. Colors look faded or incorrect
-
Check ink levels.
-
Use the correct paper type in printer settings.
-
Turn off any grayscale or draft mode options.
4. Printer dialog doesn’t appear
-
Turn on “Use System Dialog” when clicking “Send to Printer.”

Best Printable Materials for Epson Printers
Here are some popular types of paper to use when printing from Cricut Design Space:
| Material Type | Best Use |
|---|---|
| Matte Sticker Paper | Planner stickers, envelope seals |
| Glossy Sticker Paper | Photo stickers, labels |
| Printable Vinyl | Durable decals, waterproof labels |
| Printable HTV | Iron-on designs for fabrics |
| Cardstock | Greeting cards, die cuts |
Make sure to choose the right print settings based on your material. For example, use “Photo Paper Glossy” when using glossy sticker sheets.
Print Then Cut Tips for Epson Users
-
Always print at 100% scale—do not shrink to fit.
-
Use a light grip mat for thin paper types.
-
Store printed materials flat to avoid curling.
-
Print one page at a time for consistent results.
-
Use the latest version of Cricut Design Space.

Final Thoughts
Printing from Cricut Design Space to an Epson printer might feel tricky at first, but once you learn the steps, it becomes quick and easy. You just need to prepare your design, connect your Epson printer properly, adjust a few settings, and then print your project. The Cricut machine will handle the cutting with precision. Whether you’re creating personalized gifts, custom labels, or professional-looking stickers, this method is simple and powerful. Just be sure to use good-quality materials and update your software often. Also, don’t forget to calibrate your machine if the cuts look off. With the right setup, you can bring your designs to life in no time. Your Epson printer and Cricut machine make a great team when used together the right way. Now that you’ve read this guide, go ahead and try it out. Happy printing and crafting!
Read More: How to Convert an Epson EcoTank Printer to Sublimation: A Complete Guide
