Keeping your Epson printer’s printheads clean is essential for maintaining high-quality prints. Over time, ink residue can dry and clog the nozzles, leading to issues like streaks, missing colors, or faded text/images. These clogs disrupt ink flow, affecting print accuracy and color vibrancy.
Common signs of a clogged printhead include:
– Streaks or lines in your prints.
– Missing colors (e.g., red not appearing even when selected).
– Faded or blotchy output, especially in graphics.
Regular maintenance—like automatic cleanings or manual methods—can prevent these problems. In this guide, we’ll walk you through step-by-step solutions, from software-based cleaning to advanced manual techniques.
Automatic Cleaning via Printer Software
Epson printers come with built-in software tools that make printhead cleaning quick and hassle-free. This automatic method is the first step you should try when dealing with clogged nozzles or print quality issues.
Step-by-Step Guide:
-
Open the Epson Printer Utility
-
On Windows: Go to Control Panel > Devices and Printers, right-click your Epson printer, and select Printing Preferences.
-
On Mac: Open System Preferences > Printers & Scanners, select your printer, and click Options & Supplies > Utility.
-
Alternatively, open the EPSON Printer Utility (if installed separately).
-
-
Select Head Cleaning
-
Navigate to the Maintenance or Utility tab.
-
Click on Head Cleaning (some models may label it as Nozzle Check or Printhead Cleaning).
-
-
Start the Cleaning Cycle
-
Follow the on-screen prompts to begin the process.
-
The printer will flush ink through the nozzles to clear any blockages.
-
Note: This process uses ink, so avoid excessive cleaning cycles.
-
-
Run a Nozzle Check
-
After cleaning, print a Nozzle Check Pattern to verify if the issue is resolved.
-
If streaks or missing colors persist, you may need to repeat the cleaning or try a Deep Cleaning (available in some models).
-
Tips:
-
Perform cleaning no more than 2-3 times in a row to prevent ink wastage.
-
If problems continue, proceed to manual cleaning or ink tube flushing (covered in later sections).
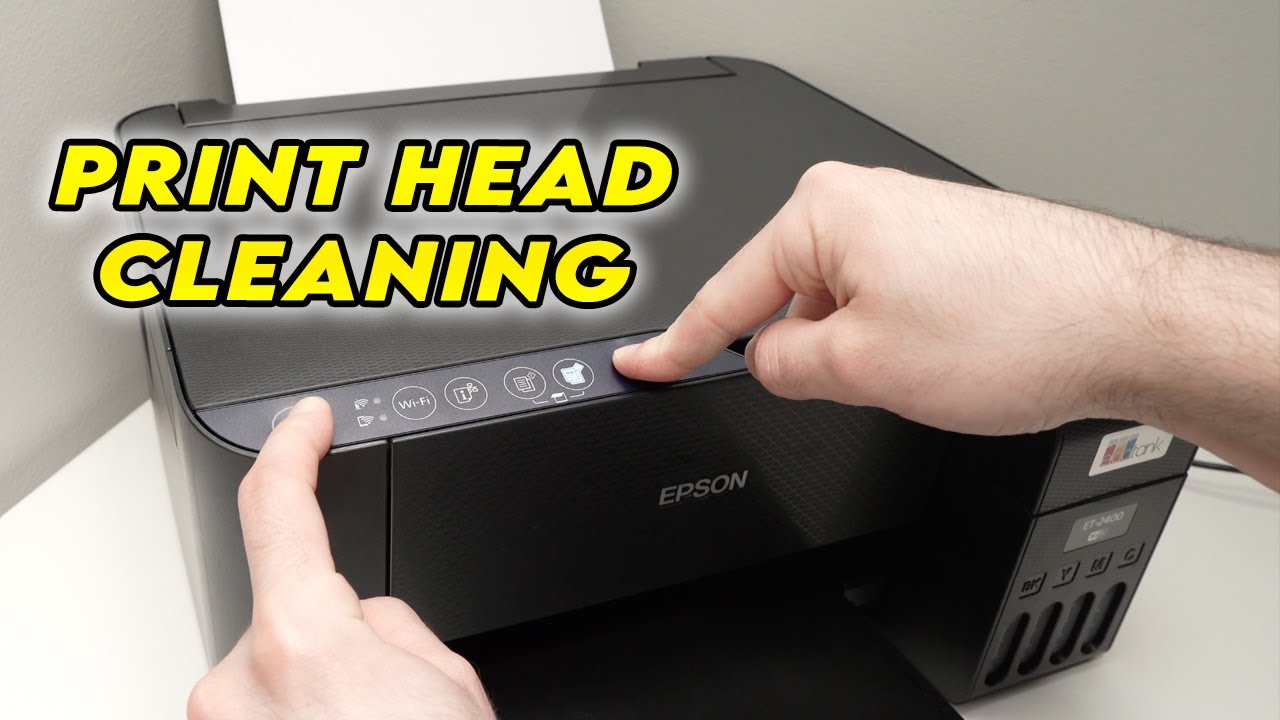
Using the Control Panel for Printhead Cleaning
Many Epson printer models allow you to perform printhead cleaning directly from the device’s control panel, without needing a computer. This method is convenient when you don’t have immediate access to your PC or Mac.
Step-by-Step Instructions:
-
Access the Maintenance Menu
-
Turn on your Epson printer and ensure it’s idle (not printing).
-
On the printer’s control panel, navigate to:
-
Setup or Settings (on newer models)
-
Maintenance or Tools (on older models)
-
-
-
Select Head Cleaning
-
Choose the Head Cleaning option from the menu.
-
Some models may show Nozzle Check or Printhead Cleaning instead.
-
Confirm your selection when prompted.
-
-
Start the Cleaning Process
-
The printer will begin an automated cleaning cycle (typically takes 1-2 minutes).
-
Do not turn off the printer during this process.
-
-
Run a Nozzle Check
-
After cleaning completes, select Nozzle Check from the same menu.
-
The printer will print a test page showing color patterns.
-
Examine the printout:
-
If lines are solid with no gaps, cleaning was successful.
-
If streaks or missing colors remain, repeat the cleaning once more.
-
-
Important Notes:
-
Limit cleaning cycles to 2-3 attempts in a row to conserve ink.
-
If problems persist after multiple cleanings, try:
-
Deep Cleaning (if available in your printer’s menu)
-
Manual cleaning (covered in later sections)
-
-
Older Epson models may require holding specific buttons (like the Ink and Paper Feed buttons simultaneously) to initiate cleaning.
Flushing the Ink Tubes (Advanced Cleaning Method)
When standard cleaning methods fail to resolve stubborn clogs, your Epson printer may need an ink tube flushing procedure. This powerful cleaning cycle forces fresh ink through the entire system to dislodge dried ink deposits.
When to Use This Method:
-
After 3 unsuccessful automatic cleaning attempts
-
When multiple colors are missing from prints
-
If you haven’t used the printer for several months
Step-by-Step Process:
-
Prepare Your Printer
-
Ensure all ink cartridges have at least 30% ink remaining
-
Place several sheets of plain paper in the tray
-
-
Initiate Flushing Mode
-
Turn off the printer completely
-
Press and hold the [Power] + [Stop] buttons simultaneously (some models may use different button combinations)
-
Keep holding for 10 seconds until you hear the printer initialize
-
-
Follow On-Screen Prompts
-
The display will show special maintenance options
-
Select “Ink System Flush” or “Tube Cleaning”
-
Confirm when prompted (this process uses significant ink)
-
-
Complete the Process
-
The printer will run an extended cleaning cycle (5-10 minutes)
-
You may hear unusual pumping sounds – this is normal
-
Do not interrupt the process
-
-
Verify Results
-
After completion, run a nozzle check pattern
-
If issues persist, wait 2 hours and repeat once more
-
If still clogged, proceed to manual cleaning methods
-
Important Warnings:
⚠️ This method consumes large amounts of ink
⚠️ Only perform 1-2 times before consulting Epson support
⚠️ Never use third-party cleaning solutions in this process
For most users, this advanced cleaning should resolve even severe clogs. If problems continue after two attempts, your printer may need professional service.
Manual Printhead Cleaning
When automatic methods fail, a careful manual cleaning can often restore your Epson printer’s performance. This hands-on approach is particularly effective for stubborn dried ink clogs.
Required Materials:
✔️ Distilled water (never tap water)
✔️ Lint-free microfiber cloth
✔️ Latex/nitrile gloves (optional but recommended)
✔️ Cotton swabs (Q-tips)
✔️ Small plastic container (for soaking, if needed)
Step-by-Step Guide:
1. Prepare Your Workspace
-
Turn off and unplug the printer
-
Cover your work surface with newspaper or paper towels
-
Wear gloves to protect your hands from ink
2. Access the Printhead
-
Open the printer cover and wait for the printhead to move to the center
-
Locate the printhead carriage (refer to your manual if unsure)
-
Carefully remove all ink cartridges following your model’s instructions
3. Clean the Cartridges
-
Wipe the copper contacts on each cartridge with a dry microfiber cloth
-
Inspect for dried ink around the nozzles – if present, dab gently with a cloth dampened with distilled water
4. Clean the Printhead
-
Dampen a lint-free cloth with distilled water (wring out excess)
-
Gently wipe the printhead contacts inside the printer
-
For stubborn clogs:
-
Moisten a cotton swab with distilled water
-
Lightly dab clogged nozzles (don’t scrub)
-
Let sit for 2-3 minutes to loosen dried ink
-
5. Deep Cleaning Option (For Severe Clogs)
-
Place folded damp cloth beneath printhead
-
Let sit for 10-15 minutes to soften hardened ink
-
Gently wipe clean with fresh damp cloth
6. Reassemble and Test
-
Reinsert all cartridges securely
-
Close the printer cover and power on
-
Run 1-2 nozzle checks to verify cleaning results
Important Tips:
• Always use distilled water – minerals in tap water can cause damage
• Never use alcohol, solvents, or compressed air
• If printhead won’t come clean after 2 attempts, stop to prevent damage
• Consider professional service if problems persist
This manual method can resolve most stubborn clogs while being gentler than repeated automatic cleanings that waste ink.
Deep Cleaning (Advanced Solutions for Stubborn Clogs)
When standard cleaning methods fail, these advanced techniques can rescue severely clogged Epson printheads. Proceed with caution as these methods consume significant ink or require disassembly.
Method 1: Power Cleaning (Software Intensive Clean)
When to Use:
• After 3 failed standard cleanings
• When multiple colors are completely missing
• Before printer storage
How to Perform:
-
Open Epson Printer Utility
-
Navigate to Maintenance > Power Cleaning
-
Confirm the process (uses 3× normal cleaning ink)
-
Run immediately after:
-
Nozzle check
-
Alignment print
-
Important:
❗ Limit to once per month
❗ Not available on all models
❗ May shorten ink system lifespan if overused
Method 2: Printhead Soak (For Extreme Cases)
Required Materials:
-
Distilled water (100ml)
-
Shallow plastic container
-
Syringe (no needle)
-
Plastic wrap
Step-by-Step:
-
Remove Printhead (consult manual for model-specific instructions)
-
Typically requires removing screws/covers
-
Disconnect ribbon cables carefully
-
-
Prepare Soaking Station
-
Line container with damp paper towels
-
Place printhead nozzle-side down
-
-
Apply Cleaning Solution
-
Use syringe to apply distilled water to ink inlets
-
Cover with plastic wrap to slow evaporation
-
-
Soak Duration:
-
4 hours for moderate clogs
-
Overnight for severe cases
-
-
Reinstall & Test
-
Blot dry with lint-free cloth
-
Reassemble carefully
-
Run 3 nozzle checks consecutively
-
Professional Alternatives:
For printers still under warranty:
• Contact Epson Support (free service may be available)
• Authorized repair centers have ultrasonic cleaning tanks
Maintenance After Deep Cleaning:
• Print color pages weekly to prevent new clogs
• Use genuine Epson ink (third-party inks clog faster)
• Store printer with cartridges installed if unused >2 weeks
This intensive cleaning should only be attempted when all other options fail. If clogs persist after these methods, your printhead may need replacement.
Troubleshooting Persistent Printhead Issues
Even after thorough cleaning, some stubborn clogs may resist standard solutions. Follow this systematic approach to diagnose and resolve ongoing print quality problems.
Step 1: Verify the Problem
Before proceeding, confirm:
✓ All ink cartridges are genuine Epson and properly installed
✓ All protective tapes were removed from new cartridges
✓ Printer software shows adequate ink levels
Step 2: Advanced Cleaning Sequence
-
Run 2 Standard Cleanings
-
Wait 10 minutes between cycles
-
-
Perform Power Cleaning (if available)
-
Maximum 1-2 times weekly
-
-
Manual Cleaning
-
Follow distilled water method from previous section
-
-
Ink System Flush
-
Use printer’s deep cleaning utility
-
Step 3: Diagnostic Tests
Print Quality Test Patterns:
-
Nozzle check (reveals which colors are problematic)
-
Alignment page (checks mechanical positioning)
-
Demo page (tests overall performance)
Common Pattern Interpretations:
▸ Missing color blocks = Severe nozzle clogs
▸ Faint/streaky colors = Partial clogs
▸ Misaligned lines = Mechanical issue
Step 4: Hardware Checks
-
Inspect Printhead Contacts
-
Look for corrosion or bent pins
-
-
Check Ink System
-
Ensure no leaks in cartridges or tubes
-
Verify ink is flowing to dump pad
-
-
Examine Waste Ink Pad
-
Full pads trigger error codes
-
Requires professional replacement
-
When to Stop DIY Repairs:
✖ Electrical burning smells
✖ Error codes persist after reset
✖ Visible damage to printhead
Final Options Before Replacement:
• Firmware Update (via Epson website)
• Factory Reset (clears all settings)
• Printhead Soak (24-hour distilled water bath)
If all solutions fail:
→ Use Epson’s online support chat
→ Locate authorized service centers
→ Consider printhead replacement cost vs. new printer
Remember: Printheads have limited lifespans (typically 2-5 years with proper maintenance). For printers over 3 years old, replacement may be more economical than extensive repairs.
When to Seek Professional Help for Your Epson Printer
While many printhead issues can be resolved at home, certain situations require expert intervention. Recognizing these scenarios can save you time, money, and potential damage to your printer.
1. Persistent Clogs After Multiple Cleanings
If you’ve attempted the following without success:
✔ 2-3 automatic cleaning cycles
✔ 1-2 power cleaning cycles
✔ Manual cleaning with distilled water
✔ Ink tube flushing
Why professional help is needed:
-
Deep clogs may require ultrasonic cleaning
-
Internal ink pathways may need purging
-
Printer may need calibration after intensive cleaning
2. Physical Damage to the Printhead
Seek immediate professional assistance if you notice:
✖ Bent or broken electrical contacts
✖ Cracked printhead housing
✖ Corrosion on metal components
✖ Ink leakage inside the printer
Risks of ignoring damage:
→ Electrical shorts can occur
→ May void your warranty
→ Can damage other printer components
3. Error Messages Requiring Professional Service
These Epson error codes typically need technician attention:
• Service Required 000X (waste ink pad full)
• Hardware Error codes (E-01 through E-90 series)
• Cartridge Cannot Be Recognized (after multiple replacements)
4. Printer Age Considerations
For printers:
-
Under warranty: Always contact Epson first
-
3-5 years old: Compare repair vs. replacement costs
-
Over 5 years: New printer may be more economical
Professional Service Options
-
Epson-Authorized Repair Centers
-
Use genuine parts
-
Preserve any remaining warranty
-
-
Mail-In Service
-
Epson offers flat-rate repairs
-
Typically 7-10 day turnaround
-
-
Local Repair Shops
-
Verify they specialize in Epson printers
-
Ask about warranties on repairs
-
Cost Considerations
| Service Type | Average Cost | Turnaround Time |
|---|---|---|
| Waste ink pad replacement | $50-$100 | 1-2 days |
| Printhead replacement | $150-$300 | 3-5 days |
| Full system cleaning | $75-$150 | 2-3 days |
Tip: Epson often provides free phone support even for out-of-warranty printers.
Remember that professional cleaning can often extend your printer’s life by 2-3 years when done properly. For printers showing multiple issues, investing in a new model with warranty protection may be the smarter long-term choice.