Printers can sometimes stop working and show an “offline” status. This can be frustrating, especially when you need to print something quickly. Don’t worry—this is a common issue on both Windows and macOS systems. The good news is that it’s often easy to fix.
An offline printer usually means there’s a problem with the connection between your printer and computer. It might be a simple setting, a network issue, or a problem with the printer’s status. In this guide, we’ll walk you through clear steps to get your printer back online.
Whether you use Windows or macOS, you’ll find easy solutions here. Follow each method step by step, and you’ll be printing again in no time. Let’s start with how to fix this problem on a Windows computer.
Method 1: Troubleshooting in Windows
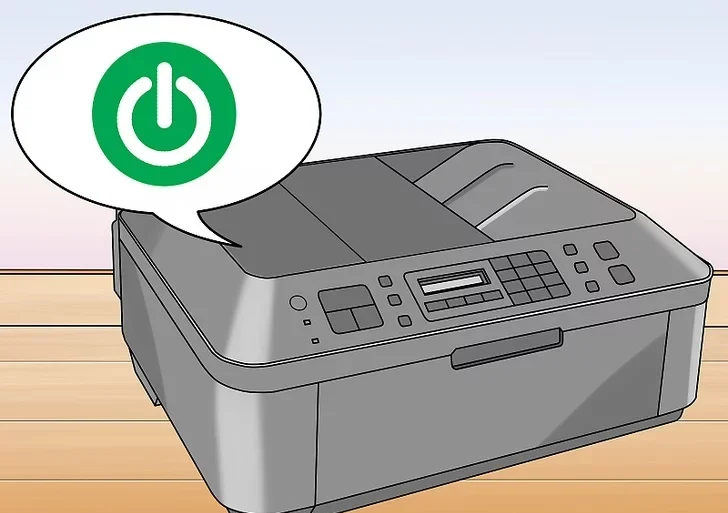
1. Make sure your printer is turned on
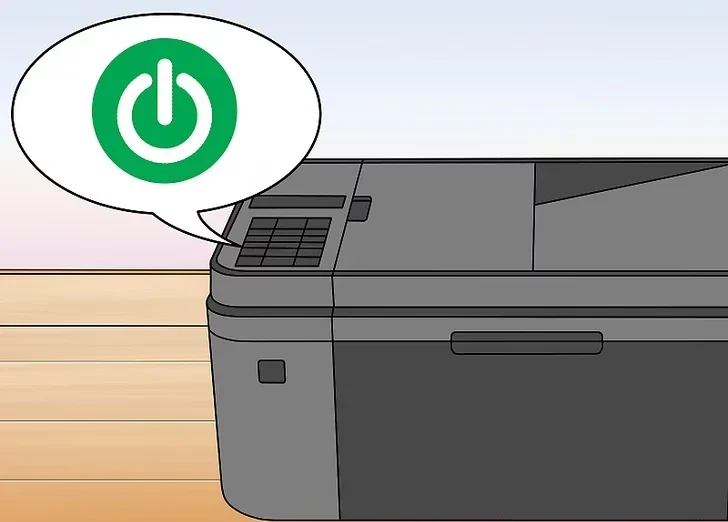
Check the power button on your printer. If it’s off, press the power button to turn it on. Look for any lights or display messages. If nothing happens, check the power cable and plug it firmly into the wall socket and the printer. Try another outlet if needed.
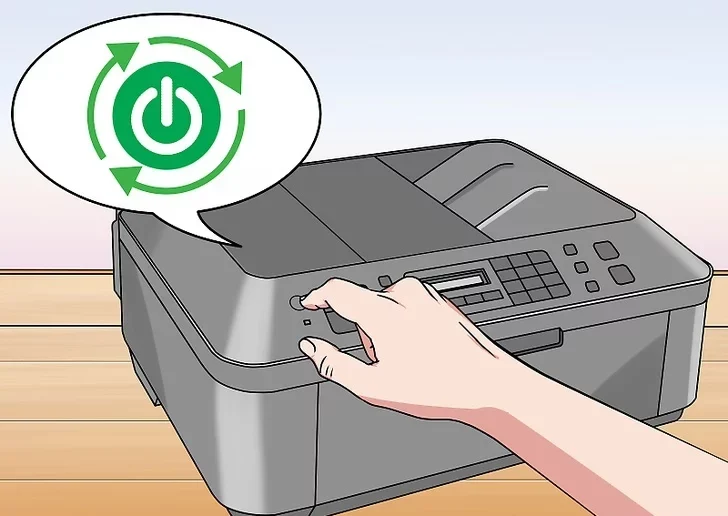
2. Restart your printer
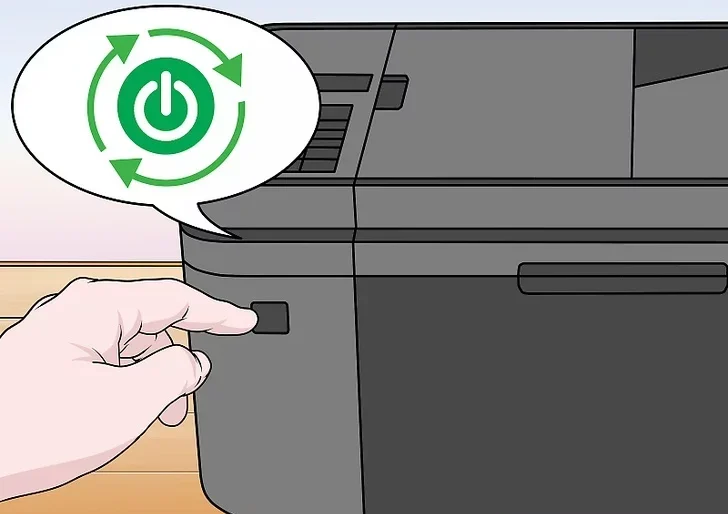
Sometimes, restarting the printer can fix connection issues. Turn off your printer, wait about 10 seconds, then turn it back on. Wait for it to fully power up before checking its status on your computer.
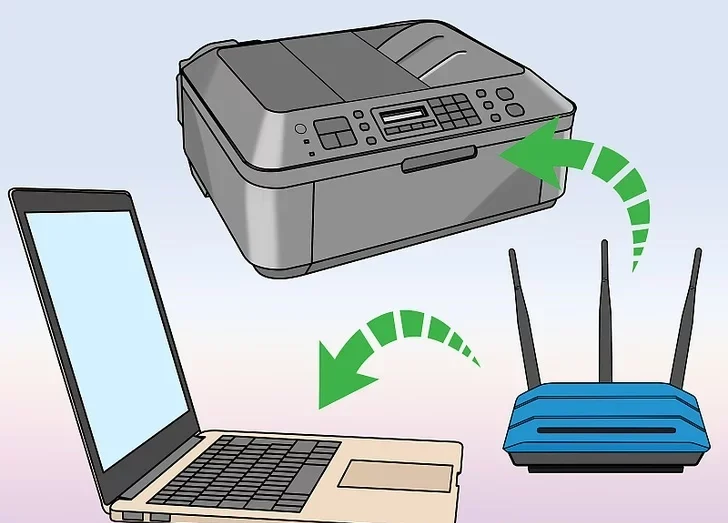
3. Make sure the printer is connected to the same network as your computer
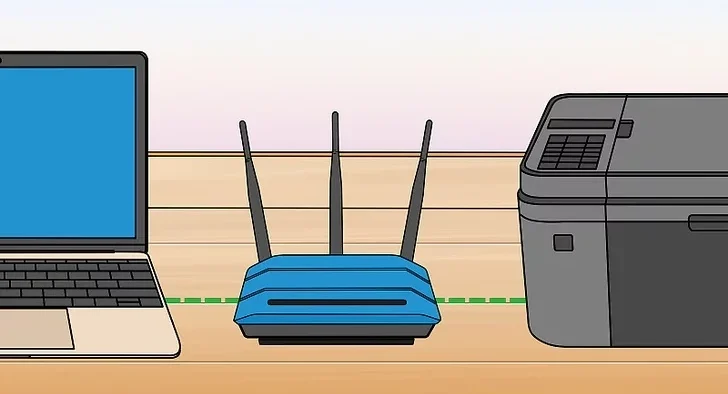
If your printer is wireless, it needs to be on the same Wi-Fi network as your PC. Go to your printer’s network settings from its control panel or screen. Make sure it shows the correct network name (SSID). If not, connect it to the right one. For wired printers, check if the USB or Ethernet cable is securely connected.
4. Make sure there is paper in the printer trayCheck the input tray of your printer. If there’s no paper, the printer might not respond and show as offline. Load some paper into the tray, adjust the paper guides, and try printing again. Also, make sure there’s no paper jam inside the printer.
5. Restart the print spooler
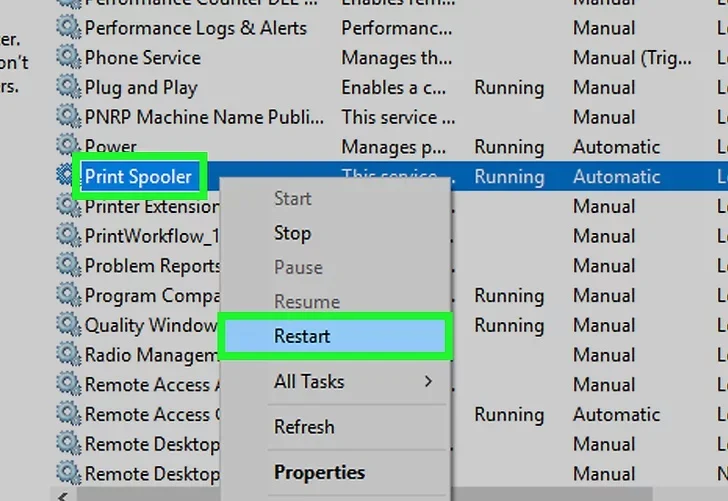
The print spooler is a service that manages print jobs. If it stops working, your printer may show as offline. To restart it:
-
Press
Windows + Rto open the Run dialog. -
Type
services.mscand press Enter. -
In the Services window, scroll down and find Print Spooler.
-
Right-click on it and choose Restart.
Wait a few seconds, then try printing again.
6. Click on the Windows Start menu and select Settings
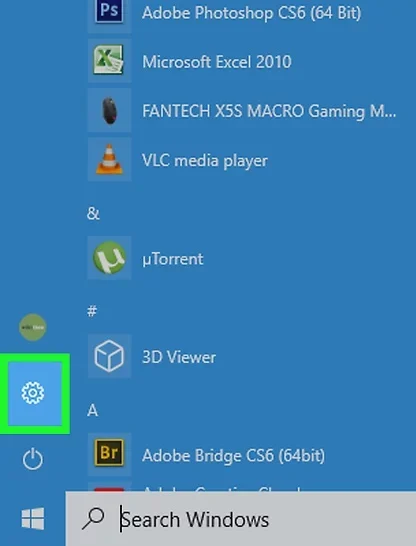
Click the Start button in the bottom-left corner of your screen. From the menu, click the Settings gear icon. This opens the Windows Settings window.
7. Select Devices. It’s in the Settings menu.
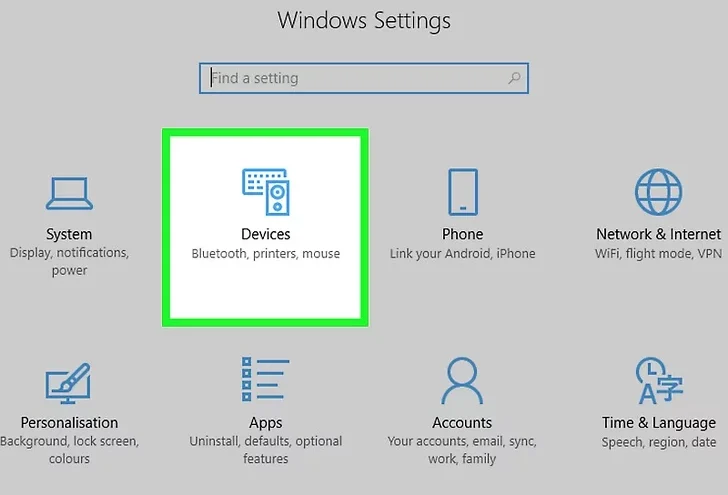
In the Settings window, click on Devices. This is where you can manage your connected devices, including printers and scanners.
8. Click Printers & scanners
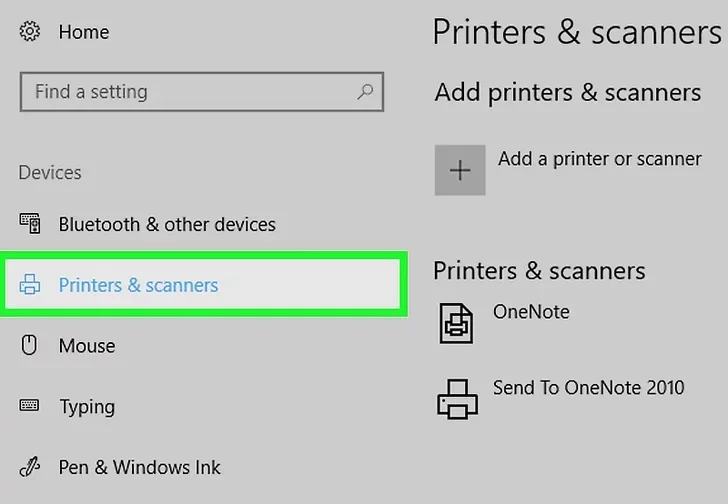
On the left-hand side, click Printers & scanners. You will see a list of printers that are connected to your computer.
9. Clear the print queue
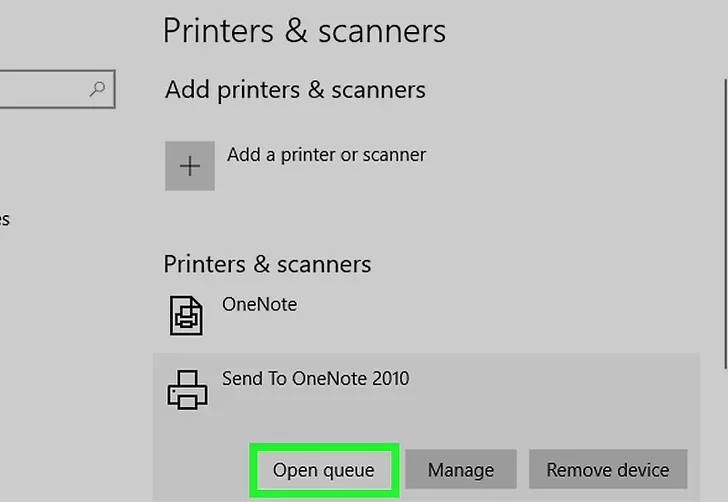
Sometimes a stuck print job can stop your printer from working.
-
Click on your printer’s name in the list.
-
Then click Open queue.
-
In the queue window, right-click each job and select Cancel.
After clearing all jobs, close the window and try printing again.
10. Click on the printer’s name and select Remove device
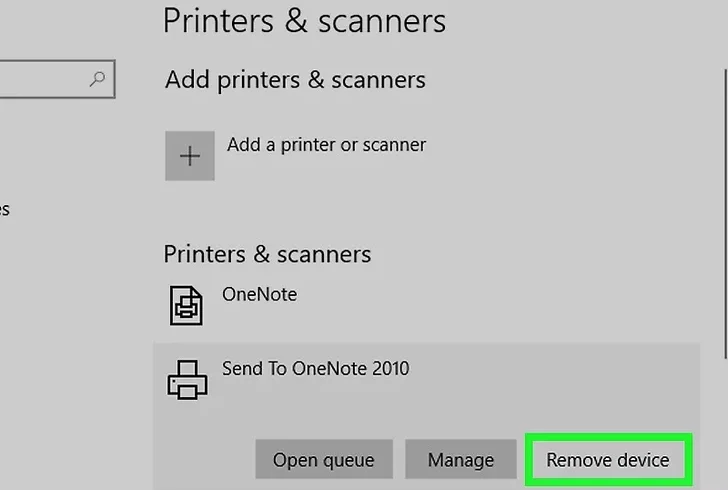
If your printer still appears offline, try removing it and adding it back.
-
In the Printers & scanners settings, click on your printer’s name.
-
Then click Remove device and confirm the action.
This will delete the printer from your computer’s list.
11. Click Add a device or printer
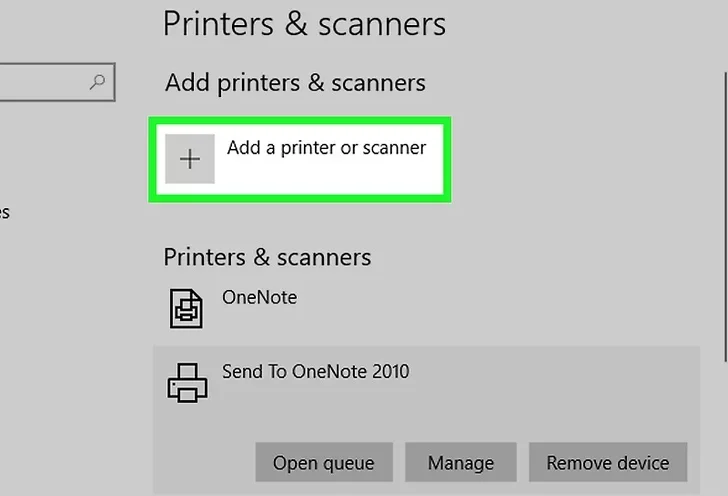
After removing the printer, stay in the Printers & scanners settings.
-
Click on Add a printer or scanner at the top.
-
Windows will start searching for available printers.
12. Follow the on-screen instructions to re-add your printer
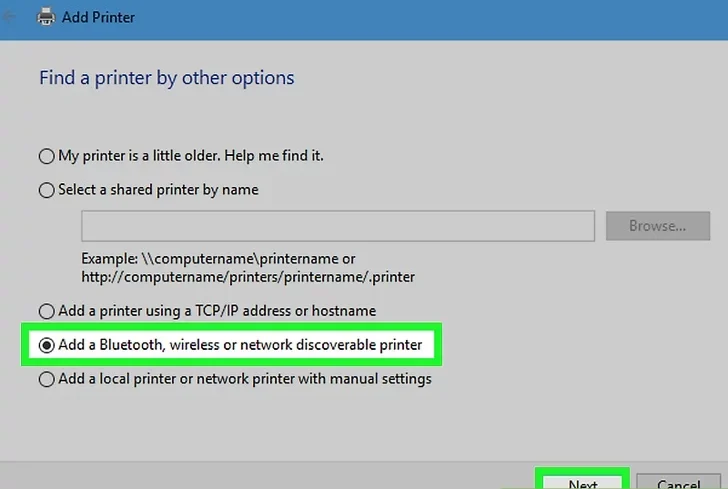
When your printer shows up in the list, click on it.
-
Follow the prompts to reinstall it.
-
Windows will automatically install the correct drivers.
Wait until the process finishes and the printer appears in your list again.
13. Set your printer as the default printer
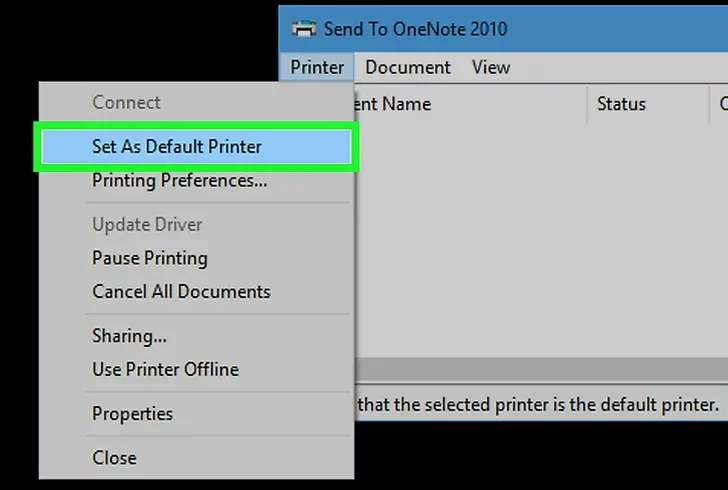
To make sure your computer always uses the right printer:
-
Click on your printer in the list.
-
Select Manage, then click Set as default.
A green check mark will appear next to the printer.
14. Contact your printer manufacturer for assistance
If none of the steps above work, the issue might be hardware-related or more complex.
Visit your printer brand’s support website or contact customer service.
They can guide you through model-specific troubleshooting steps or repairs.
Method 2: Troubleshooting on macOS
1. Make sure your printer is turned on
Begin by checking that your printer is powered on. Look for lights or messages on the display screen. If nothing appears, press the power button. Make sure the power cable is firmly plugged into the printer and the wall outlet.
2. Restart your printer
A quick restart can solve many minor glitches. Turn the printer off, wait about 10 seconds, and then turn it back on. Give it time to fully restart before moving to the next step.
3. Make sure the printer is connected to the same network as your computer
If your printer is wireless, it needs to be on the same Wi-Fi network as your Mac. Open the printer’s network or wireless settings to check the connection. Reconnect to the correct network if needed. For wired printers, make sure the USB or Ethernet cable is properly connected.
4. Make sure there is paper in the printer tray
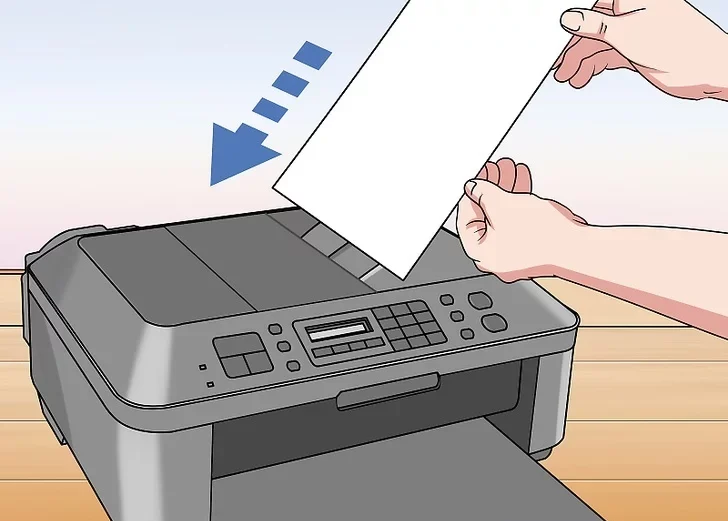
Lift the paper tray and check if there is paper loaded. If not, insert paper and adjust the tray guides. If the printer is jammed, remove any stuck paper before continuing. An empty or jammed tray may cause the printer to go offline.
5. Click the Apple menu

On your Mac, go to the top-left corner of the screen and click the Apple icon. This will open a drop-down menu with several system options.
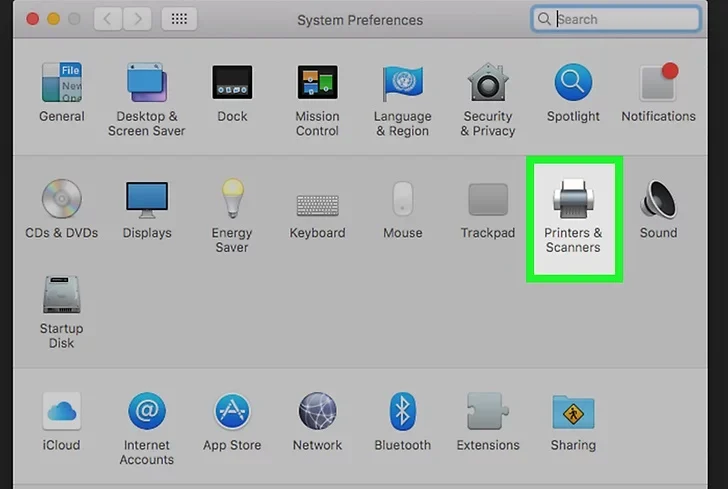
6. Click System Preferences on the menu
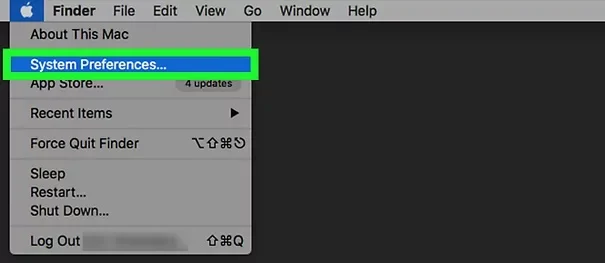
From the Apple menu, select System Preferences. A new window will open where you can change various settings on your Mac.
7. Click Printers & Scanners or Print & Scan

In the System Preferences window, look for Printers & Scanners. On older macOS versions, this may be labeled Print & Scan. Click this option to open the settings where you can view and manage your connected printers.
8. Right-click anywhere inside the Printers window
Inside the Printers & Scanners window, you’ll see a list of available printers on the left side. Right-click (or hold Control and click) anywhere in the white space of this list.
9. Select Reset printing system in the menu
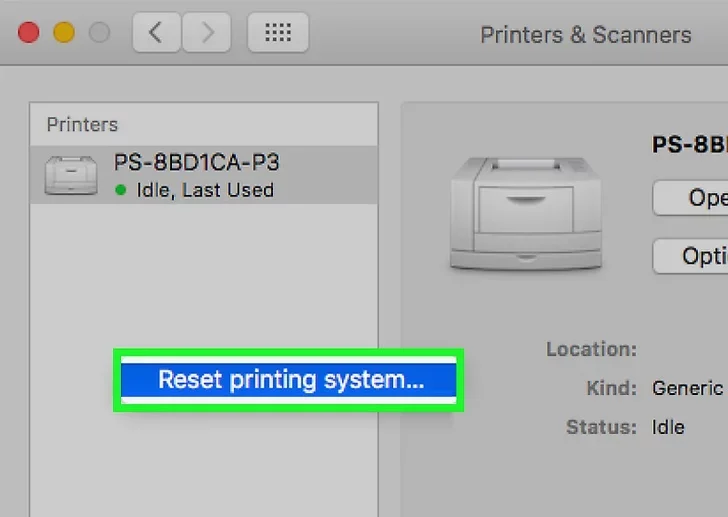
From the pop-up menu, choose Reset printing system. This option removes all printers and scanners from your Mac and clears printer settings.
10. Click Reset in the confirmation window

A warning message will appear asking you to confirm. Click the Reset button to proceed. Your Mac will now clear the entire print system and settings.
11. Enter the Administrator name and password and click OK
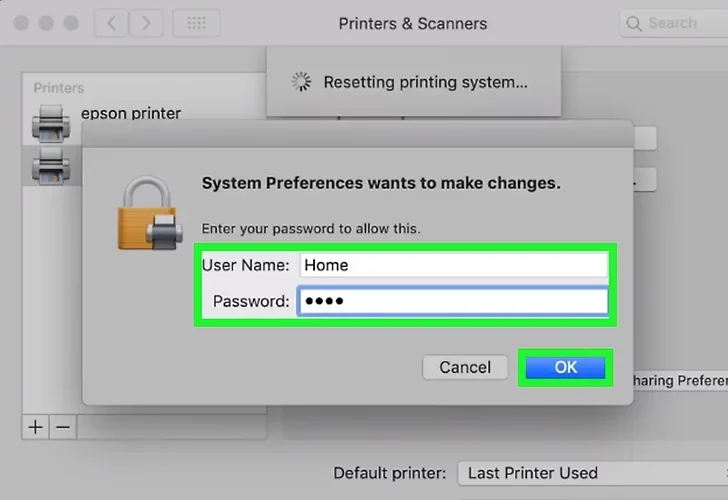
To complete the reset, you’ll be asked to enter your administrator name and password. Type them in and click OK. The list of printers will now be empty, and you’ll need to re-add your printer.
12. Navigate back to the Printers & Scanners page
Once the reset is complete, your printer list will be empty. If you’re not already there, go back to System Preferences > Printers & Scanners.
13. Click Add a Device
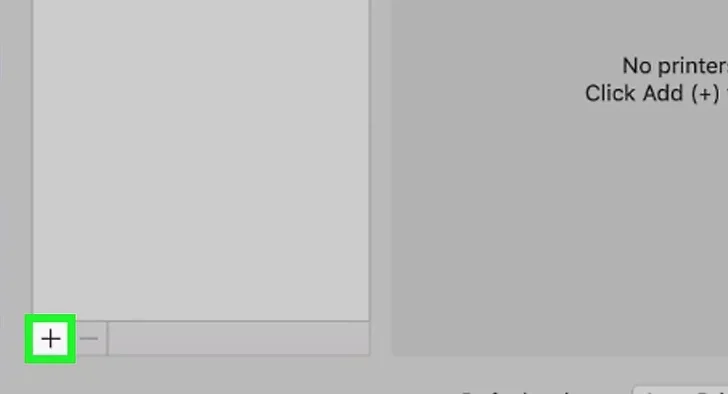
Click the plus (+) button below the printer list on the left. This opens a window where your Mac will search for available printers nearby or on the same network.
14. Select your printer and click Add

Find your printer in the list that appears. Click on it to highlight it, then click the Add button. Your Mac will connect to the printer and install any necessary drivers.
15. Contact your printer manufacturer for assistance
If your printer still appears offline after all these steps, the problem may be more advanced. Visit the printer manufacturer’s support website or call their help center. They can help with hardware issues, software updates, or advanced troubleshooting.
Video
Final Thoughts
References
https://support.microsoft.com/en-us/help/4496876/windows-10-troubleshooting-offline-printer-problems
Read More: 3 Ways to Stop Printer Spooling on a Windows Computer